- About
- Objective
- Features
- Documentation
- Documentation Builder
- Setup
- Setup Domain
- Page Builder
- BYOS
- LMS
- About LMS
- Creating Courses
- Course Management
- CMS
- Site Features
- Posts
- Media
- Live Customizer
- Workshops
- Zoom Meetings in AcademyLauncher
- Google Meet in Workshops & Google login
- Community
- Community features
- Users
- eCommerce
- Products
- Memberships
- Orders
- Subscriptions
- Payments
- Configuring Stripe
- Payment Settings
- Configuring Razorpay
- Reports
- Dashboard
- Course reports
- Administrator
- Policy
- Privacy Policy
- FAQ
- Default Storage
- Setting up site logo, title
- Customize Dashboard Menu
- Account
- Account workspace overview
- Manage plan, imports, policies, and ownership
- Manage workspace features
- Manage domains, URLs, and sitemap
- Manage data and privacy requests
- Configure role navigation
- Configure dashboard layout
Configuring CDN with BunnyCDN
Overview
AcademyLauncher provides built-in support for Content Delivery Networks (CDNs) to optimize content delivery and enhance security. By default, AcademyLauncher uses BunnyCDN, a leading CDN provider, for the following reasons:
High-performance content delivery.
Secure video CDN support to protect your video content from unauthorized access.
Default CDN Usage
AcademyLauncher’s default CDN configuration is based on your subscription plan, which determines your CDN storage and bandwidth limits.
If your content requirements exceed these limits or if you prefer to manage your own CDN account, you can configure a custom BunnyCDN account for use with AcademyLauncher.
Supported CDN: BunnyCDN
BunnyCDN provides:
Fast content delivery across a global network.
Secure video streaming through BunnyStream.
Easy integration with AcademyLauncher.
Setup Instructions
Follow these steps to configure your own BunnyCDN account with AcademyLauncher:
Step 1: Login to AcademyLauncher
Access your AcademyLauncher account with administrator credentials.
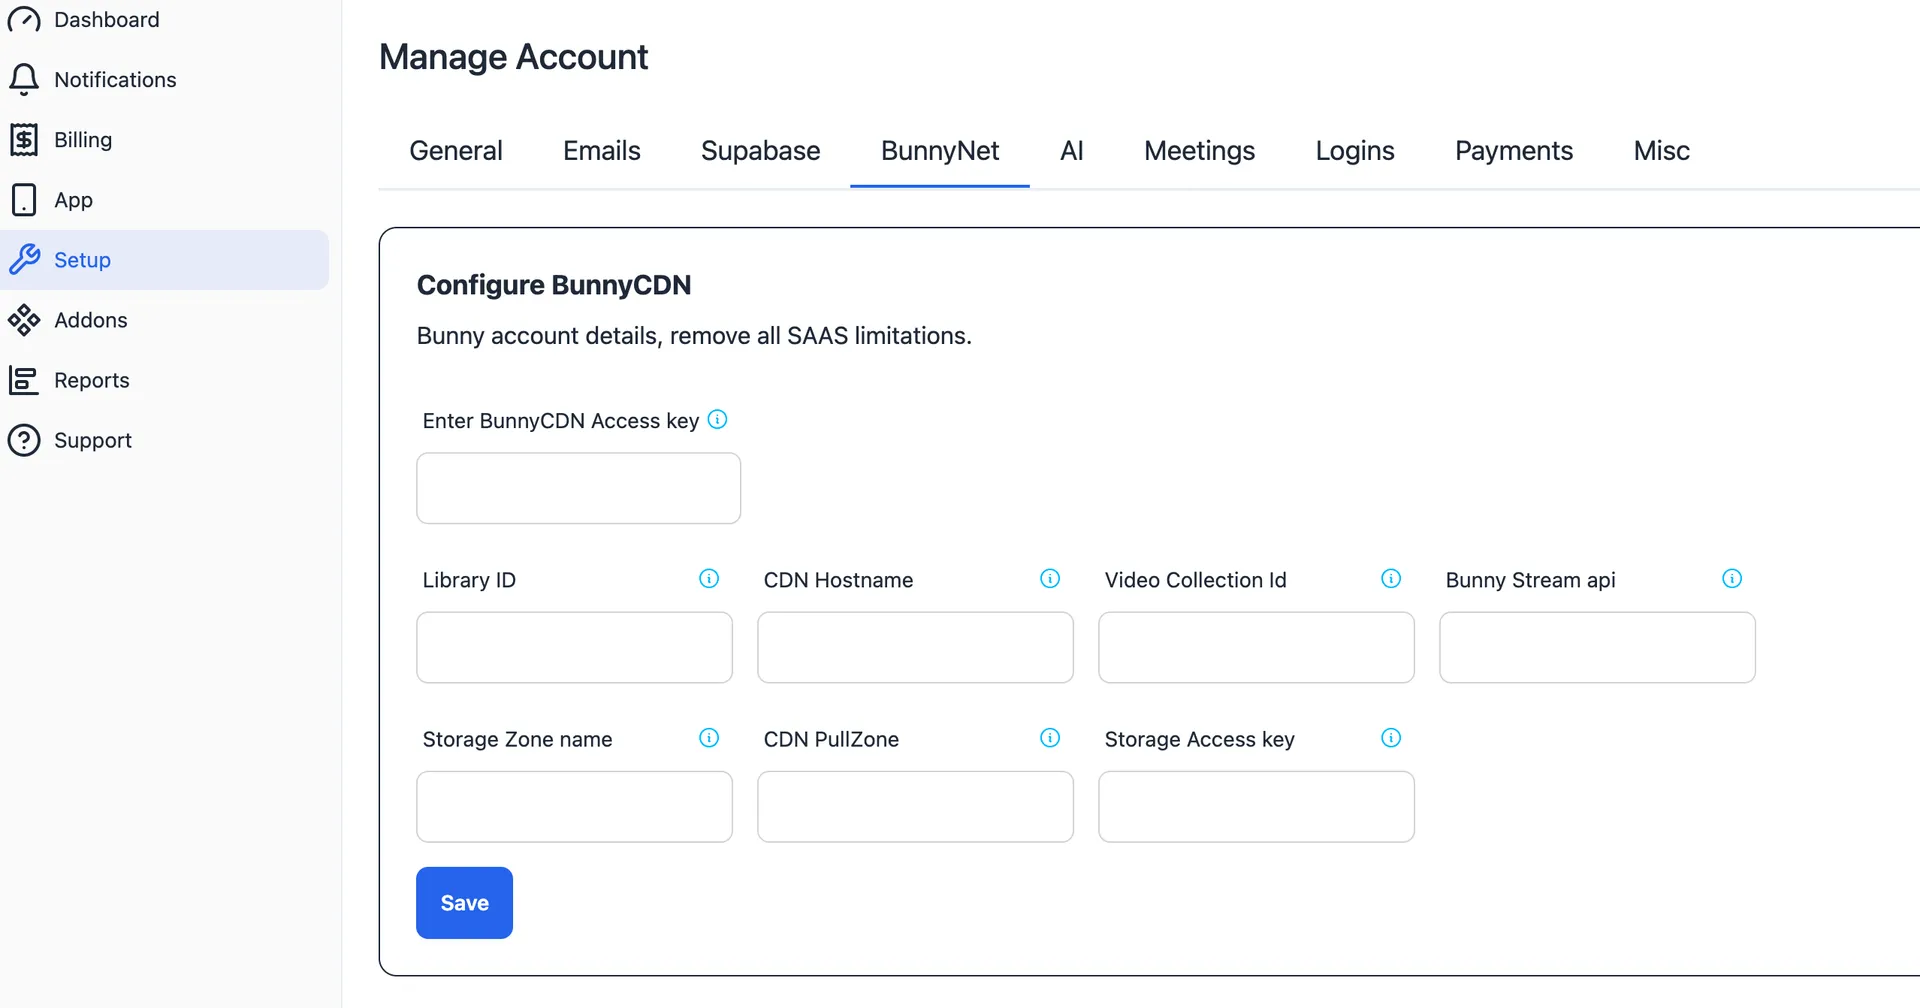
Step 2: Open the Setup Section
From the dashboard, navigate to the Setup section.
Step 3: Locate BunnyNET Settings
Within the Setup section, find and select BunnyNET to configure CDN settings.
Step 4: Configure Access Key and Defaults
Enter your BunnyCDN Access Key obtained from your BunnyStream account.
Configure additional default settings as required.
Step 5: Save Configuration
Save the settings to activate your custom CDN.
Completion
Once configured, your AcademyLauncher account will deliver content using your BunnyCDN account, ensuring secure, high-performance delivery for videos and other media.