- About
- Objective
- Features
- Documentation
- Documentation Builder
- Setup
- Setup Domain
- Page Builder
- BYOS
- LMS
- About LMS
- Creating Courses
- Course Management
- CMS
- Site Features
- Posts
- Media
- Live Customizer
- Workshops
- Zoom Meetings in AcademyLauncher
- Google Meet in Workshops & Google login
- Community
- Community features
- Users
- eCommerce
- Products
- Memberships
- Orders
- Subscriptions
- Payments
- Configuring Stripe
- Payment Settings
- Configuring Razorpay
- Reports
- Dashboard
- Course reports
- Administrator
- Policy
- Privacy Policy
- FAQ
- Default Storage
- Setting up site logo, title
- Customize Dashboard Menu
- Account
- Account workspace overview
- Manage plan, imports, policies, and ownership
- Manage workspace features
- Manage domains, URLs, and sitemap
- Manage data and privacy requests
- Configure role navigation
- Configure dashboard layout
Configuring Custom Email Sending Domain
Overview
AcademyLauncher provides the option to configure your own domain and email settings, allowing all outgoing emails to be sent from your organization's domain. This guide explains how to set up and configure email sending using your custom site domain (TLD).
Default Email Configuration
By default, all emails sent through AcademyLauncher are delivered using the following sender address:
Email sending limits under the default configuration are governed by the subscription plan associated with your AcademyLauncher account.
Using Resend for Email Delivery
AcademyLauncher also supports email delivery through Resend. When you switch to Resend as your email provider:
Email sending limits will be determined by your Resend subscription plan.
You must configure and verify your email sending domain within your Resend account.
A valid Resend API key must be added to your AcademyLauncher account.
If you have already added your Resend API key and configured your sending domain in Resend, you may skip the remainder of this guide.
Setup Instructions
Follow the steps below to configure your custom email sending domain:
Step 1: Log in to AcademyLauncher
Sign in to your AcademyLauncher account.
Step 2: Navigate to the Setup Section
From the dashboard, locate and open the Setup section.
Step 3: Open Email Settings
Within the Setup section, select Emails to access email configuration settings.
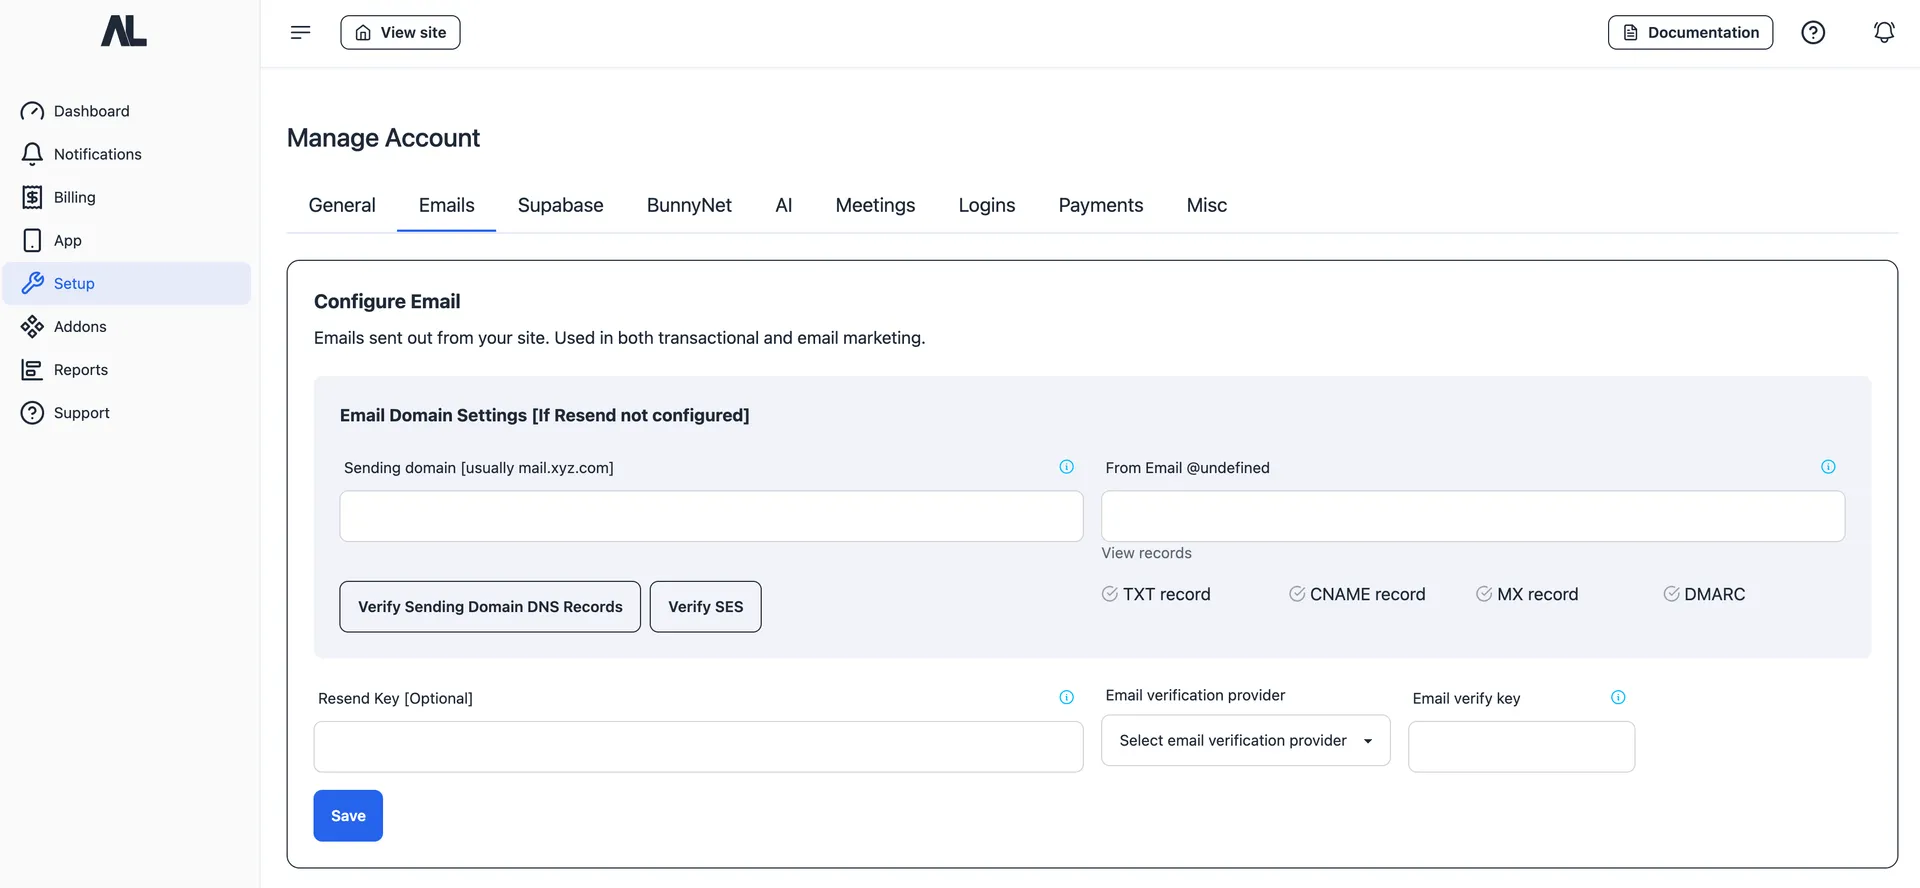
Step 4: Configure DNS Records
AcademyLauncher will provide the required DNS records for your domain. Add these records to your domain's DNS management panel.
Step 5: Verify DNS Configuration
After adding the DNS records, return to the Email Settings page and verify that all DNS records have been successfully detected and validated.
Step 6: Start Sending Emails
Once verification is complete, your custom domain will be ready for email delivery, and all outgoing emails can be sent using your configured domain.
Additional Notes
DNS propagation may take some time depending on your DNS provider.
Ensure that all required records are added exactly as provided.
If you are using Resend, domain verification must be completed in both Resend and AcademyLauncher before email delivery can begin.
For additional assistance, please contact AcademyLauncher support.