- About
- Objective
- Features
- Documentation
- Documentation Builder
- Setup
- Setup Domain
- Page Builder
- BYOS
- LMS
- About LMS
- Creating Courses
- Course Management
- CMS
- Site Features
- Posts
- Media
- Live Customizer
- Workshops
- Zoom Meetings in AcademyLauncher
- Google Meet in Workshops & Google login
- Community
- Community features
- Users
- eCommerce
- Products
- Memberships
- Orders
- Subscriptions
- Payments
- Configuring Stripe
- Payment Settings
- Configuring Razorpay
- Reports
- Dashboard
- Course reports
- Administrator
- Policy
- Privacy Policy
- FAQ
- Default Storage
- Setting up site logo, title
- Customize Dashboard Menu
- Account
- Account workspace overview
- Manage plan, imports, policies, and ownership
- Manage workspace features
- Manage domains, URLs, and sitemap
- Manage data and privacy requests
- Configure role navigation
- Configure dashboard layout
Configuring Razorpay
Login to your account at AcademyLauncher.com and under Setup - payments , select Razorpay as payment gateways and Save.
Reload the page to see Razorpay payment gateway tab appear under payments section.
Login to your Razorpay account at Razorpay.com
Enable Test Mode
Now go to account settings and find our API keys.
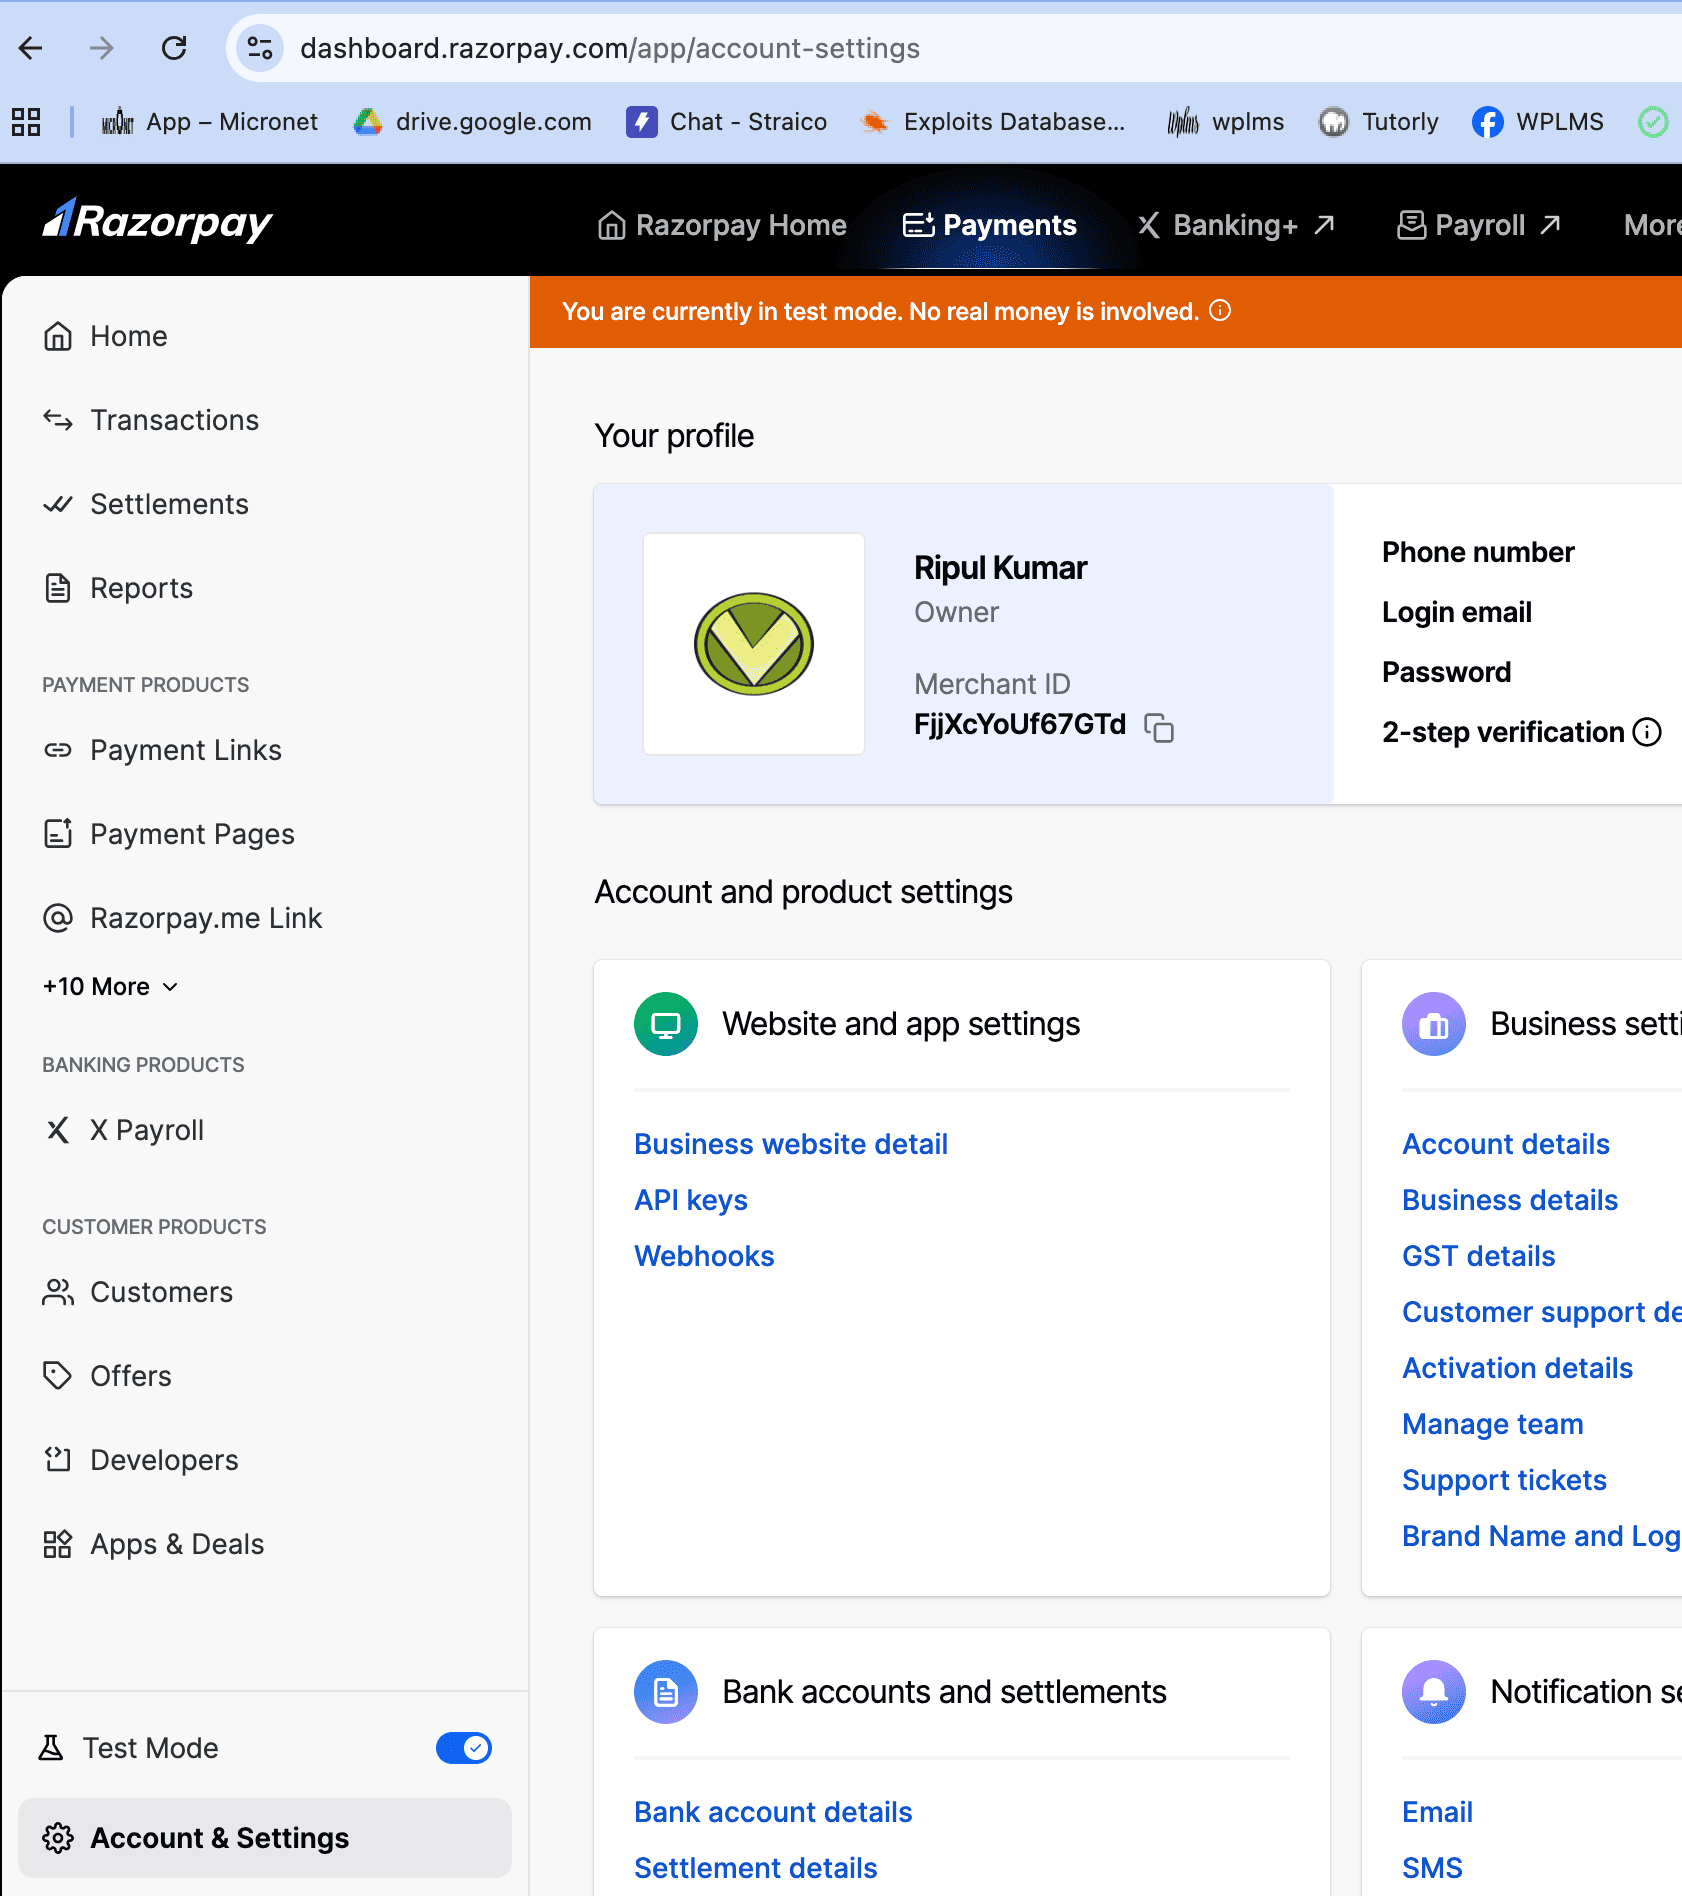
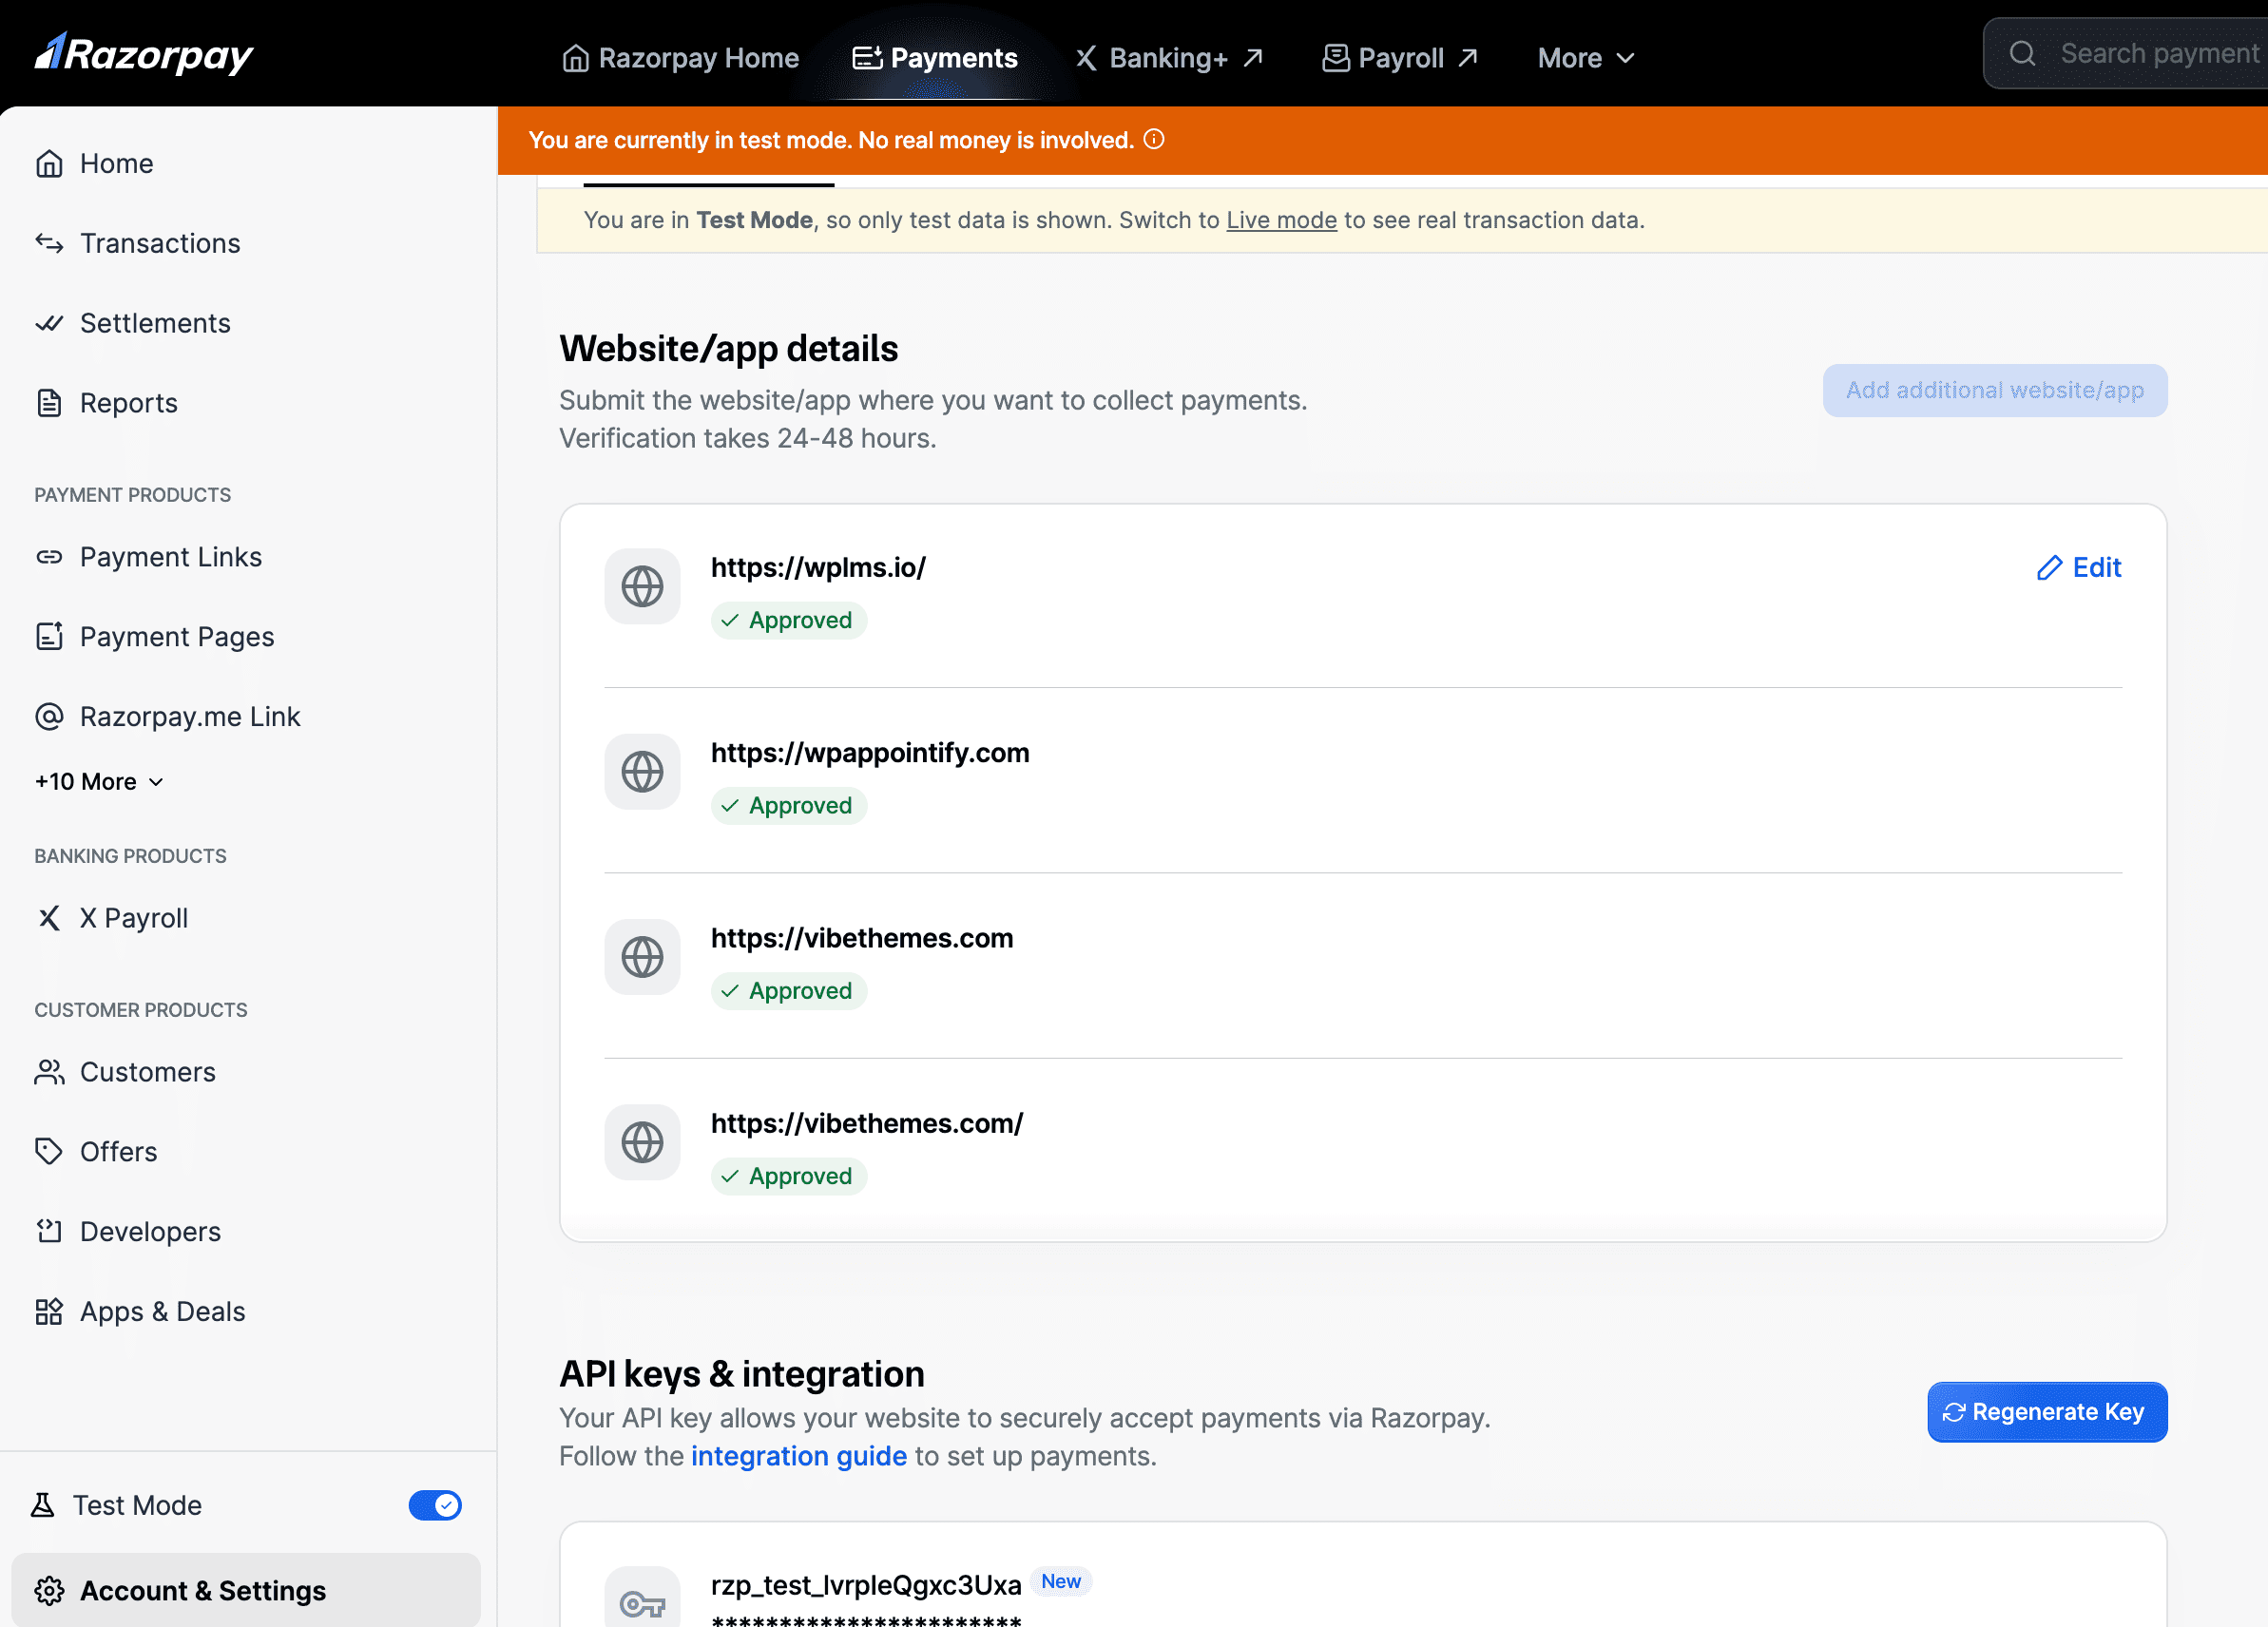
Next copy these API key, and Secret and paste it in your Account - Razorpay settings. You will be required to add your website and it needs to be approved by Razorpay team. Ensure your site is complete before you send request for approval.
Enable Webhook and generate a webhook secret from your Account - Razorpay and add it in the Razorpay settings.
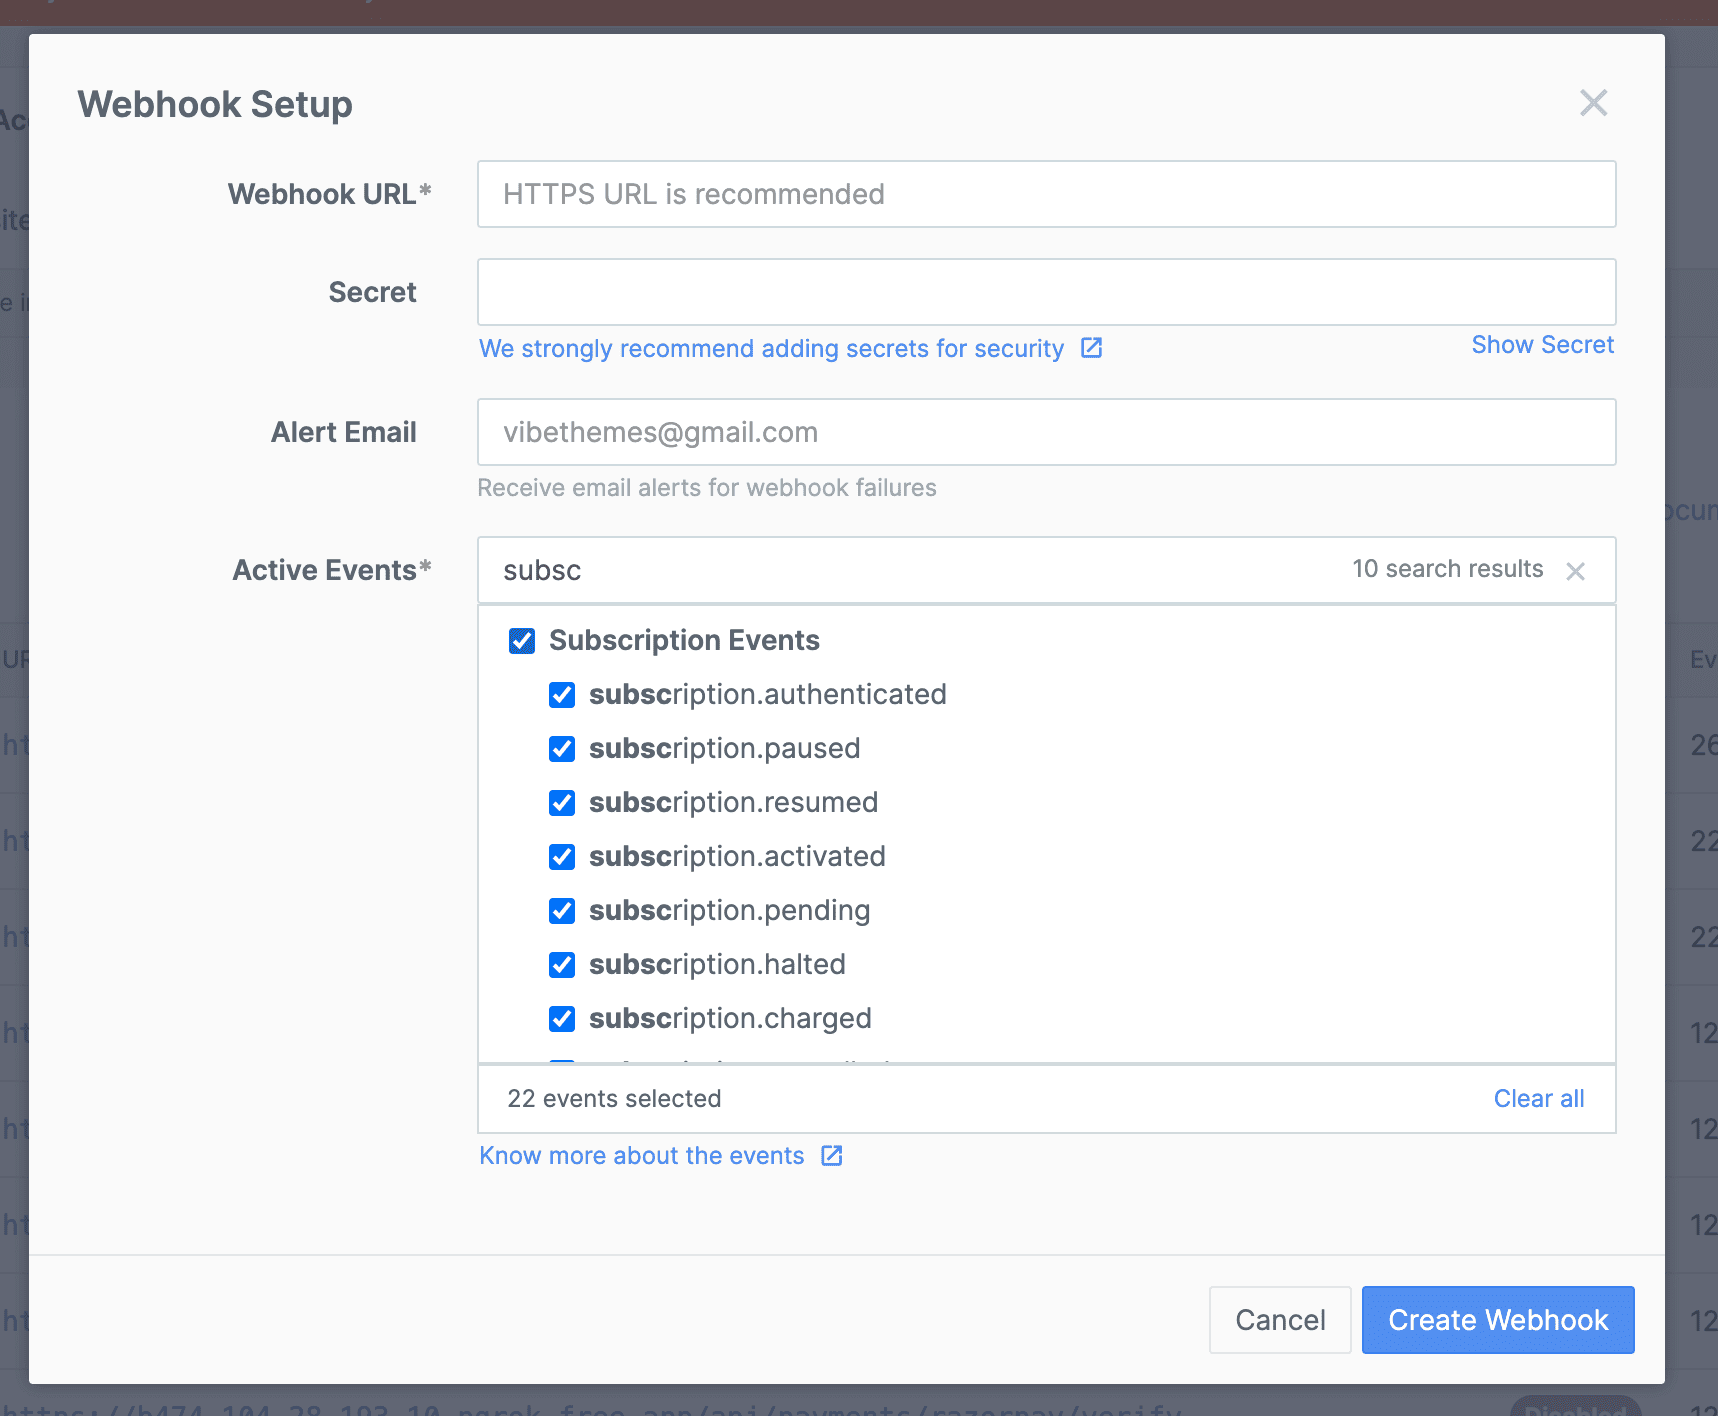
Ensure , Orders, Payments and Subscription events are enabled in the webhook.
Add the webhook url as Yoursite.com/api/payments/razorpay/verify
Now you are ready to use razorpay. Note that for all subscription products you will see a Razorpay checkbox which you need to enable to generate plan Id in Razorpay.